


Back into the Open Source Hardware Category
Those that know me understand just how “ranty” I can get about Open Source Hardware, so much so that I’m giving a talk at this year’s Wuthering Bytes Festival at Hebden Bridge about “Open Washing” your product and making your millions. Those who are really observant will have noticed that the MeArm v1.0 shipped last month, but the source files remained in my desk drawer! Well that’s all changed as of this morning. The files are now available in dxf format on thingiverse. So now you can cut it in any colour you want!
I’ve also uploaded the latest files for the Brains Board over on Github. So we’re back to be Open Source, all the way down…
Making Progress
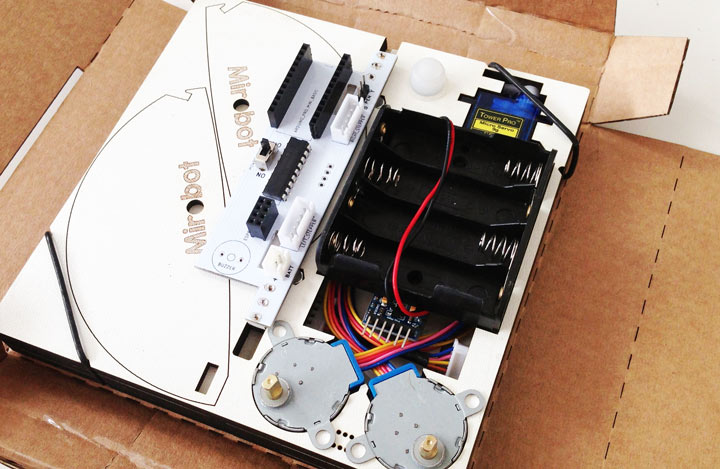
Things are moving along nicely! I just sent out 10 early version of the v2 Mirobot to some volunteer beta testers to make sure everything is working well - here’s how they’re looking:
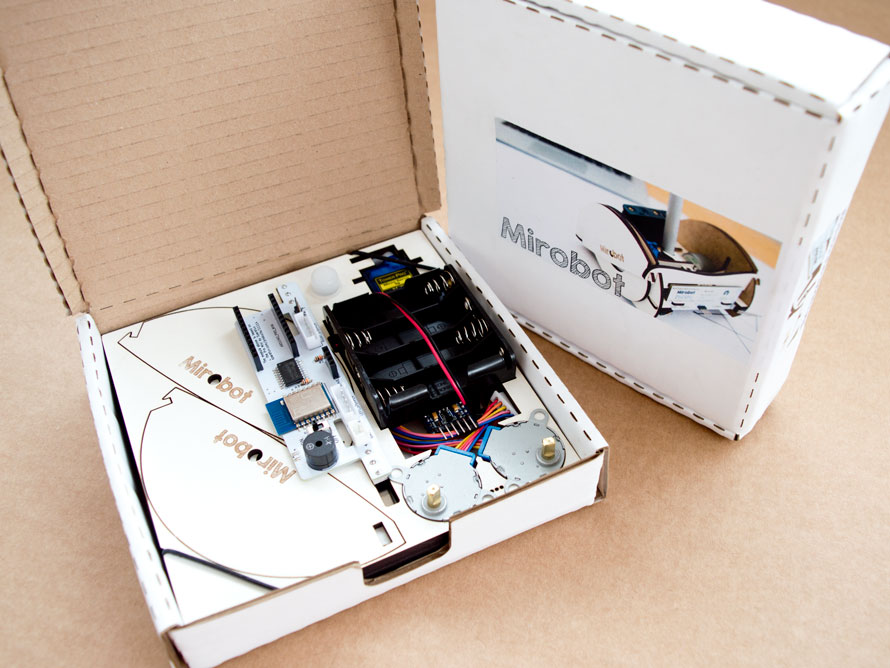
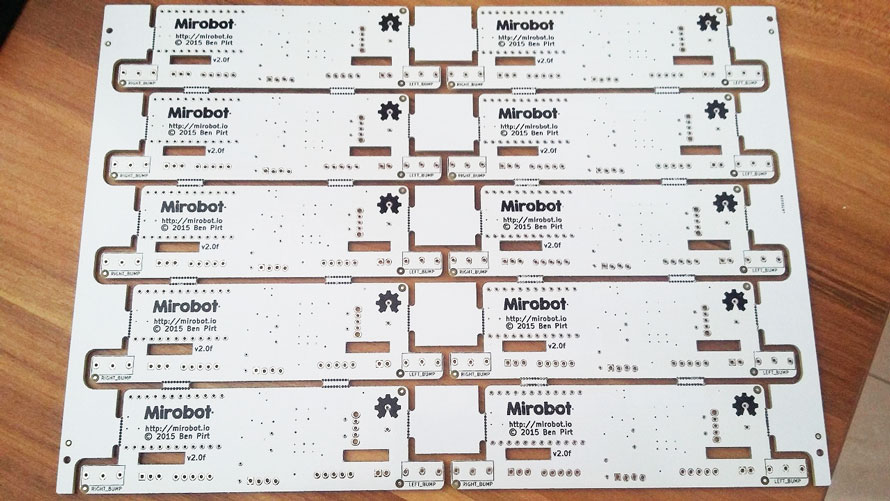
I’m really happy with how all of the pieces fit in. I’m having some custom boxes made but these ones are DIY on the laser cutter. Although this 10 were hand made, I’ve also made good progress having the PCBs assembled in volume:
In case you’re interested in seeing how Mirobot goes together in more detail, here’s the instructions for the latest version that just went online
Read moreMeArms of the World!
People always ask where we’ve sent MeArms in the world. So we thought we’d put together a map with the data we had to hand. All we’ve used is City and Country and no other data whatsoever has been passed to Google. This gives a good overview of the official MeArms of the World!
We’d love to collect more data on the Wild MeArms of the World so if anyone can help us with a web form or similar to help populate Google Maps that would be great!
Read moreProduction Update
It’s been a little under a month since the Kickstarter ended so I thought I’d make a quick update on what I’ve been working on in that time.
PCB
I’ve sent off for the next version of the PCB. Not a lot has changed on it, except a move to a slightly different WiFi module. It’s still ESP8266 based, but this time it’s the ESP-12. The main reason for this is because this module has been certified for FCC, which means I’ll have an easier time selling Mirobot. This is also a surface mount component, but since the boards are coming pre-assembled this isn’t an issue.
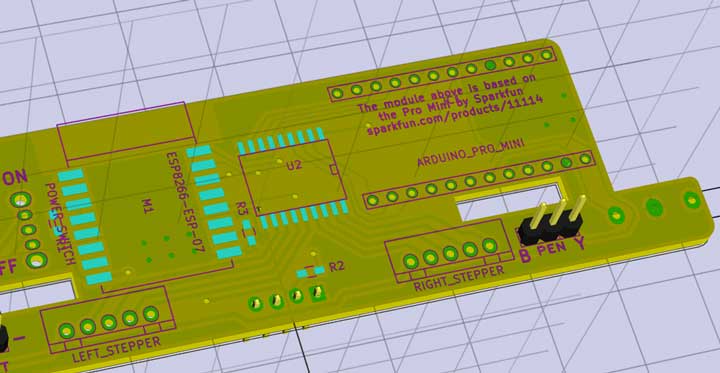
You’ll also see a Sparkfun credit for the Arduino Pro Mini on there, thanks go to Ben Gray (Phenoptix / MeArm) for leading a good example. One nice addition I’ve made is that it will be possible to reflash the ESP WiFi module using a serial adaptor if you want to really customise it (or for some reason it needs rescuing). Normal firmware updates will be over WiFi of course!
Pen Holder
The Pen holder mechanism has remained unchanged since pretty much the first iteration of Mirobot and I’ve always wanted to improve it. It was always a bit fiddly to assemble, a bit wobbly once it was assembled and kids often had issues with the small screwdriver required to put it together. Here’s a photo showing old (left) vs. new (right)
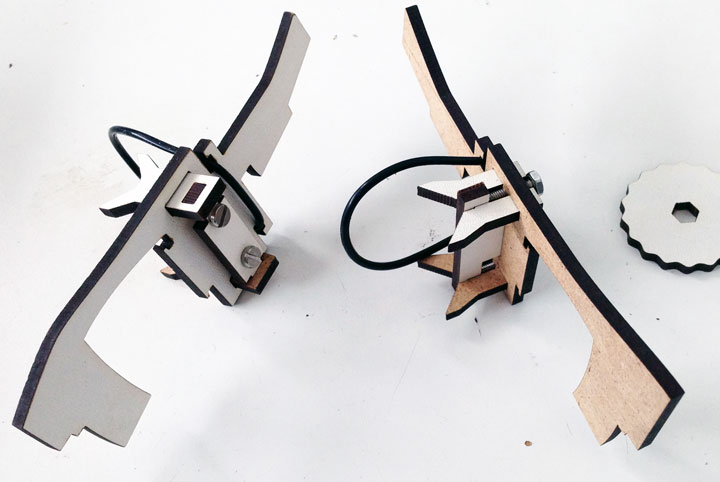
There’s now a central piece slotted through the main pen arm which provides more stability. This design has also allowed me to have the screw heads flush, which means I’ve been able to eliminate the need for any tools to assemble Mirobot. Instead of using a slotted screw head, I’m now using a hexagonal head and providing a simple and easy-to-use tool cut from MDF - you can see this to the right of the previous image, but here’s another shot:

This is particularly useful in schools because if you’re building 10 robots, they now don’t need to find 10 screwdrivers and gather them all back in! I’ve also added a small slot in the chassis which will hold it safe when you’re not using it.
It could be a little tricky to get the pen arm perfectly adjusted in V1 units, so I’ve also included a small jig which helps you get everything aligned perfectly before putting the arm in to the main chassis.
Packaging
I’ve modified the previous packaging but kept the principle the same. There are a few improvements that will benefit me in production this time:
- All parts are now seated in the layers of the MDF. Besides protecting them in transit, it means there’s no step needed to sort into bags
- It’s about 20% lighter. The last version weighed in at about 550g, which meant that for certain countries it fell into a higher price bracket. This version is more shipping-friendly
- There’s an internal box (see the next photo). This will then be wrapped in a more attractive slip case. When it’s shipped, there will be another layer of packaging which will mean that if you order one as a gift you’re safe to remove the packaging and re-wrap it. There are a couple of other optimisations over V1 that will make it much easier to pack.
What’s next?
The design for manufacture is pretty much done now. I still need to test the latest version of the PCB when it arrives from China, but now I’m starting to build the relationships with the various manufacturing partners I’m going to be using for production.
Full steam ahead!
Read more