


Project Bloks
Block based programming languages have been extremely popular in helping children learn how to program. They built nicely on the foundations of the early languages like LOGO to provide an easily understandable and syntax-error free programming environment that gives you quick results. Scratch first made this approach popular and have gained great momentum in bringing programming into education. Google developed a similar tool called Blockly that was designed to be a tool to build your own programming environments and integrate it with your own tools, which is a fantastic approach.
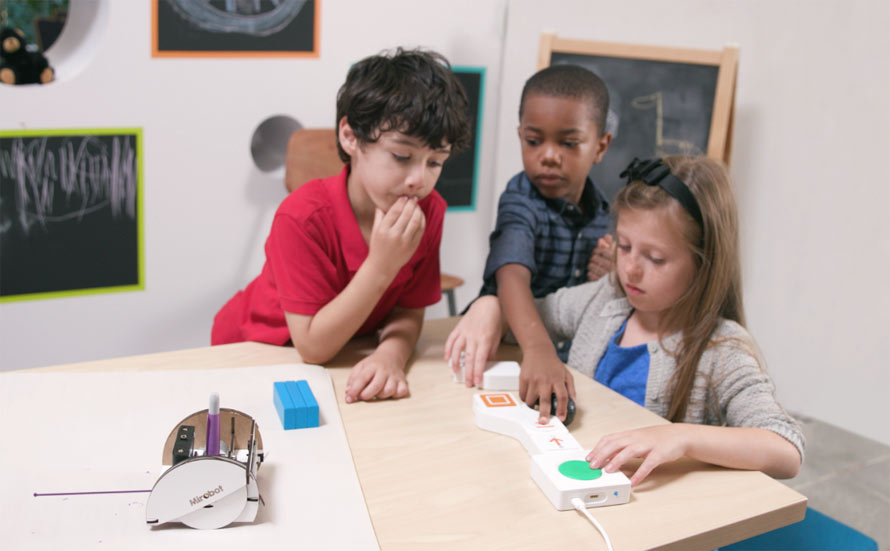
Earlier this week, however, Google again raised the stakes by turning the block-based interface physical with Project Bloks. Physical learning is something that’s close to our hearts at Mirobot, but until now the programming was always screen-based whilst interacting with a physical device.
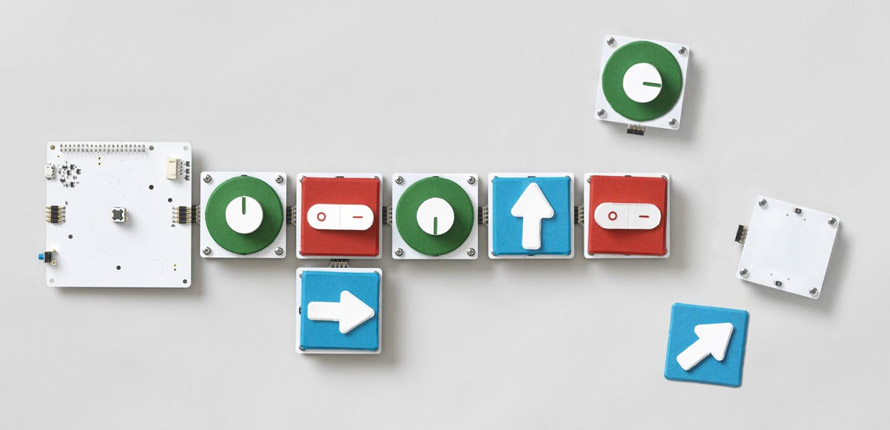
Project Bloks is a system that’s designed to be used to build physical programming tools in exactly the same way that Blockly is designed to be used to build other tools. It’s all about the platform, rather than the product. It’s an approach I’d love to see more because it leaves more room in the market for innovation and exploration. You can snap together different blocks that represent chunks of code and use the built-in physical interfaces to tweak the parameters. It makes for an incredibly fun learning experience and I believe it will be very effective in getting kids learning to code.
I’ve been fortunate enough to meet with the very talented team behind Project Bloks and have worked to support them integrating the Bloks hardware with Mirobot. Fortunately because of open protocols and data formats this was a pretty straightforward exercise and illustrates one of the drivers behind making Mirobot WiFi based - ease of connectivity. I’m very proud that Mirobot is one of three pieces of hardware that’s supported by Project Bloks out-of-the-box.
This announcement is (hopefully) just the beginning of the journey for the Project Bloks team. There’s a huge amount of thought and research that’s gone into the product so far and I can’t wait to see what’s next in the pipeline.
There’s been some great coverage over on The Guardian and Techcrunch which is worth checking out.
Read moreNew Features
I’ve been busy recently implementing a bunch of new features that I’ve had on my list for quite a while. Here’s a quick rundown on some of them:
Python App
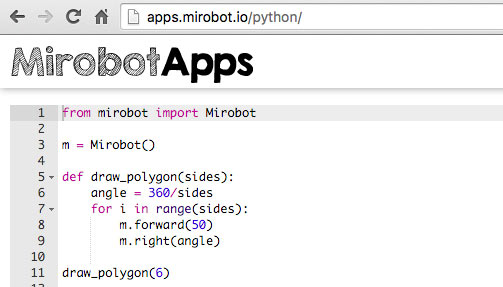
Python is a great programming language for beginners and there’s been a Python library for Mirobot for over a year now, but I’ve always wanted to make it even easier to get started so I put together a way of running Python in-browser so you don’t need to install anything. It’s made with a Python engine called Skulpt.
Auto Discovery
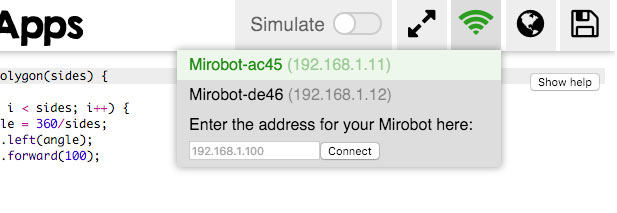
One of the parts of the setup process that always annoyed me was finding your Mirobot on your network once you’ve got it on your WiFi. The latest firmware now has a discovery process built in so that it’s easy to find. What this means is that you can now visit local.mirobot.io when you’re on your own network and it will connect directly to your Mirobot. It also means that if you visit apps.mirobot.io it will autoconnect there too or let you choose which Mirobot you want to use if you’ve got more than one on your network. I’m going to be building support for this into the Python and Javascript libraries to make them even easier to use.
Simulation Tool
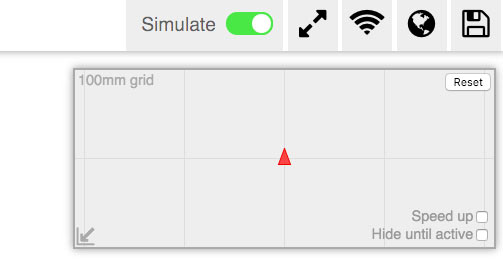
I’d always wanted to have a way of simulating how Mirobot would move that could be used by any app. Now you can just toggle a switch and it will send all commands to the simulator instead of the Mirobot. It comes in especially handy if you want to practice some programming but haven’t got your Mirobot set up and ready.
Fullscreen
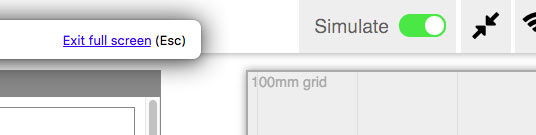
When working on programming, it’s nice to be able to remove all distractions so you can now put the apps into fullscreen mode
Chrome App
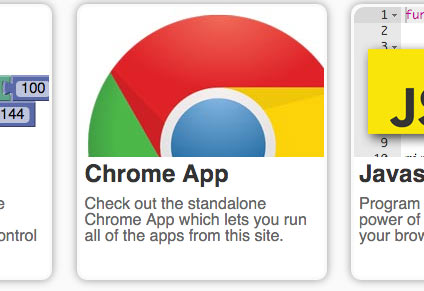
All of the apps have been packaged up into one Chrome app which lets you run it offline as well as giving you an application icon to click on. It can be installed via Chrome on Mac, Windows and Android devices.
Internationalised Apps
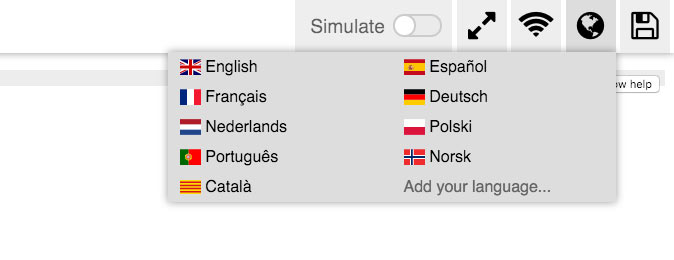
Mirobot is used in over 50 countries around the world so it’s only fitting that the apps should work in more than just English. There are currently 9 languages supported and more on their way. If you’d like to help out by spending 10 minutes translating the apps into your language please get in touch
That’s it for now - if you have any suggestions for features or apps you’d like to see, get in touch
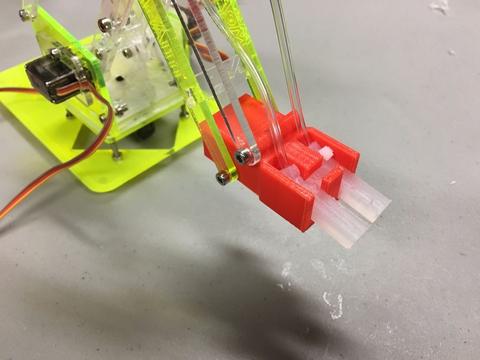
Read moreSoft Gripper for the MeArm - MeArm Mod by XYZAidan
It’s exciting to see what can be done when you start to hack and modify the MeArm. One amazing customer / hacker has made a high tech soft gripper for the MeArm, using some 3D printed parts and some tubing. Check out the video here
In addition to the video XYZAidan has made an instructable and has entered into the Full Spectrum Laser contest. It would be fantastic for such a creative maker to have access to his own laser cutter, so please visit his page and give him your vote!
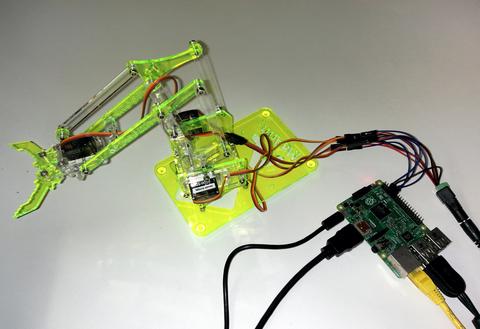
MeArm on the Raspberry Pi
Running a MeArm on a Raspberry Pi is initially very simple. We hope to make it simpler still with some good example code. Right now it’s very easy to get up and running with just a few jumper cables and an external power supply (like our 6V 2A power supply).
We’re assuming you have a Raspberry Pi up and running and all of the goodies that you need to achieve that. With that running you’re going to want to attach the Pi to the servos as shown below. We’re using GPIOs 4, 17, 18 and 27. These will become servos 0,1,2 and 3 respectively. We recommend you do this whole process before building your MeArm to save you time in calibration and also to save you burning out your servos by sending them somewhere they can’t go! (file available here)
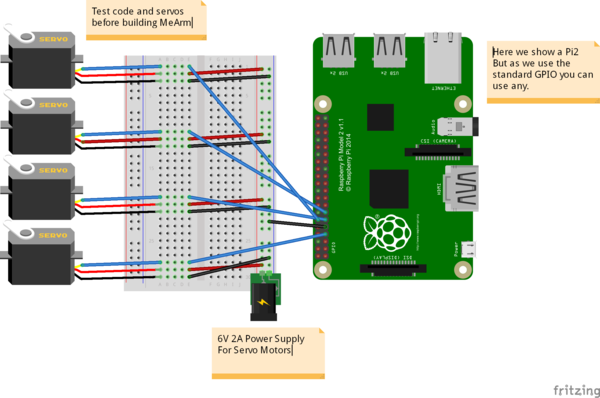
The breadboard used in the image is just to make things look tidy. In reality you can just attach all the grounds and all the power lines and wire them directly to the power, then bring the PWM lines (the servo control wires that come from the GPIO) directly into the servos. Don’t connect the 6V power to the GPIO (other than connecting the ground wire). Also it’s not advised to draw the power for the servos through the GPIO, they can draw up to an amp each and the Pi isn’t set up for that. Better safe than have to buy a new Pi!
Now we’ll need to get to the command line on your Pi. Either boot to it or use a terminal in your GUI. We used a fresh install of Raspian.
pi@raspberry ~ $ git clone git://github.com/richardghirst/PiBits.git
Cloning into ‘PiBits’…
remote: Reusing existing pack: 359, done.
remote: Total 359 (delta 0), reused 0 (delta 0)
Receiving objects: 100% (359/359), 362.62 KiB | 311.00 KiB/s, done.
Resolving deltas: 100% (154/154), done.
Checking connectivity… done.
pi@raspberry ~ $ cd PiBits/ServoBlaster/user
pi@raspberry ~/PiBits/ServoBlaster/user $ make servod
gcc -Wall -g -O2 -o servod servod.c -lm
pi@raspberry ~/PiBits/ServoBlaster/user $ sudo ./servod –idle-timeout=2000
Board revision: 2
Using hardware: PWM
Using DMA channel: 14
Idle timeout: 2000
Number of servos: 8
Servo cycle time: 20000us
Pulse increment step size: 10us
Minimum width value: 50 (500us)
Maximum width value: 250 (2500us)
Output levels: Normal
Using P1 pins: 7,11,12,13,15,16,18,22
Using P5 pins:
Servo mapping:
0 on P1-7 GPIO-4
1 on P1-11 GPIO-17
2 on P1-12 GPIO-18
3 on P1-13 GPIO-27
4 on P1-15 GPIO-22
5 on P1-16 GPIO-23
6 on P1-18 GPIO-24
7 on P1-22 GPIO-25
Now if everything is working ok, you’ll be able to send the command
| pi@raspberry ~/PiBits/ServoBlaster/user $ echo 0=50% > /dev/servoblaster |
This will send servo 0 (the one attached to GPIO 4) to 50% of its range. Changing to echo 1=20% > /dev/servoblaster will send servo 1 to 20% of its 0 –>180 degree range.
Next up we use Python and something called TKinter (which should be installed on your Pi already). Create a new file using your favourite file editor (it should be GVIM - it will make you more popular, stronger and better looking). I called it MeArm.py. Add the following code to it and save.
| #!/usr/bin/env python
from Tkinter import * #allows us to make a GUI with TKinter
import os
root = Tk()
First Set Up the Servos
Going to use lists for this
SNums = [0,1,2,3] #Numbers of the Servos we’ll be using in ServoBlaster
SName = [“Waist”,”Left”,”Right”,”Claw”] #Names of Servos
AInis = [90,152,90,60] #Initial angle for Servos 0-3
AMins = [0,60,40,60] #Minimum angles for Servos 0-3
AMaxs = [180,165,180,180] #Maximum angles for Servos 0-3
ACurs = AInis #Current angles being set as the intial angles
Step = 5
for i in range(4):
print(SNums[i],AInis[i],AMins[i],AMaxs[i],ACurs[i])
os.system(‘sudo /home/pi/PiBits/ServoBlaster/user/servod –idle-timeout=2000’) #This line is sent to command line to start the servo controller
#inc listens for all key presses. On certain presses in the if statements below it either calls a process to add or subtract from the current servo angle.
def inc(event):
print “pressed”, repr(event.char)
if repr(event.char) == “‘a’”:
AAdd(0)
if repr(event.char) == “‘d’”:
ASub(0)
if repr(event.char) == “‘w’”:
AAdd(1)
if repr(event.char) == “‘s’”:
ASub(1)
if repr(event.char) == “‘j’”:
AAdd(2)
if repr(event.char) == “‘l’”:
ASub(2)
if repr(event.char) == “‘i’”:
AAdd(3)
if repr(event.char) == “‘k’”:
ASub(3)
def callback(event):
frame.focus_set()
def AAdd(Servo):
if ACurs[Servo] < AMaxs[Servo]:
ACurs[Servo] = ACurs[Servo]+Step
# micro = (1000 + (ACurs[Servo] * 5.555))
micro = (1000 + (ACurs[Servo] * 8.3333))
print(ACurs[Servo],micro)
os.system(“echo %d=%dus > /dev/servoblaster” % (SNums[Servo],micro))
else:
print “Max Angle Reached”,SName[Servo],”Servo”
def ASub(Servo):
if ACurs[Servo] > AMins[Servo]:
ACurs[Servo] = ACurs[Servo]-Step
# micro = (1000 + (ACurs[Servo] * 5.555))
micro = (1000 + (ACurs[Servo] * 8.3333))
print(ACurs[Servo],micro)
os.system(“echo %d=%dus > /dev/servoblaster” % (SNums[Servo],micro))
else:
print “Min Angle Reached”,SName[Servo],”Servo”
frame = Frame(root, width=500, height=300)
boxtext = Label(root, text=”Click this box for keyboard command of the MeArm. Use the a d s w j l i and k keys for control.”)
boxtext.pack()
frame.bind(“<Key>“,inc)
frame.bind(“<Button-1>”, callback)
frame.pack()
| root.mainloop() |
Using a terminal or the command line type
| pi@raspberry ~ $ python MeArm.py |
All being well you should now have a pop up box that tells you to click inside it to control your MeArm!
Here’s a rough and ready video of the results!
This tutorial is thanks to Carl Monk, who did this nearly a year ago and has gone further than I have here. His excellent work can be found here.
We both rely on the ServoBlaster softwareby Richard Hirst and this great post by Cihat Keser on getting it running quickly.
Read more